I actually use the spectrum analyzer for a ton of stuff that Ableton or other VSTs have but with fancier graphics. I realize though Renoise covers it all with the solid shapes, line shapes, referencing the current track compared to the master, and more.
That and EQing / LFOs with curves helps a ton with tonal shaping that we couldn’t do before! THAT, along with your LFO tricks to make more granular gain / automation control with 256 - 512 - 1024 line long curves is SO nice.
Renoise added so much more depth lately because of such simple changes with the pitch shifter / beat synch. My hope is they keep adding small things like that over time because it makes a huge difference.
Thanks again for the video!
Nice video. But are you sure about the +3dB compensation? Sounds to me that +4.2 or even +4.5dB will make a good mix instead. Your “flatline” at 3dB could be also due the selection of the base note/octave of the instruments used in that example song and/or this specific mix.
The higher the compensation, the less bright it needs to sound to get a flatline.
Btw. if you look more exactly at your shown example song, it looks to me that it is not at all flatline at 3dB compensation, but quite a lot louder in the bass area. It only seem to look like it, because there is a negative bump around 400Hz or so.
im no expert in this topics the few tunes ive checked showed more less the same behavior a flat ish line across mids and highs and then a tiny rolloff in the highend with some spikes in the area around 500-1000Hz
I’ve finally learned how to properly use a VU meter and my mixdowns have improved 10 fold.
Also learned how to use iZotope’s TotalBalance control and my mixes improved 100 fold.
Also (re)learned that it’s all about choosing the right tool for the job. If you currently don’t have the “right tool” (and chances are you do. It’s buried somewhere) then search for recommended free alternatives to accomplish what you want instead of spending money first.
And finally, Airwindows plugins are a freaking godsend! And they are all free!!
Oh. I may add something that I’ve overlooked during all these years  So, I guess it’s a warning to us people who consider ourselves eternal noobs. Namely: use something like good near-field monitors and not just headphones. Headphones are way too “immersive”, at least for me during production, but can come in handy sometimes for practical reasons and referencing. They flatter the sound and gratifies your ears from all possible angles, making it more difficult to get the bigger picture.
Still, I tend to use headphones when making compositional moves, like 80% of the time, but for mixing it’s probably better to be on speakers ‘80%’ of the time.
Maybe too basic advice, but wasn’t for me.
This was just posted on another forum. Seems to contain a lot of golden advice: https://cdn-resources.ableton.com/resources/uploads/makingmusic/MakingMusic_DennisDeSantis.pdf
I don’t have anything to add to this, except to say that this thread is really interesting and I like to read what you all have to say.
Sort of related to this:
Use your kick drum as a level reference for mixing
i.e. set the kick to be peaking at say -10dB as it hits the master bus. Now throughout the rest of composing/balancing your mix do not touch the kick drum fader, set all volumes relative to the kick.
I was always in a habit of chasing the faders towards ‘-INF dB’ as I would pull faders down to get things to fit, including the kick. If you set and leave your kick as the reference point then you are forced to keep everything at a respectable level.
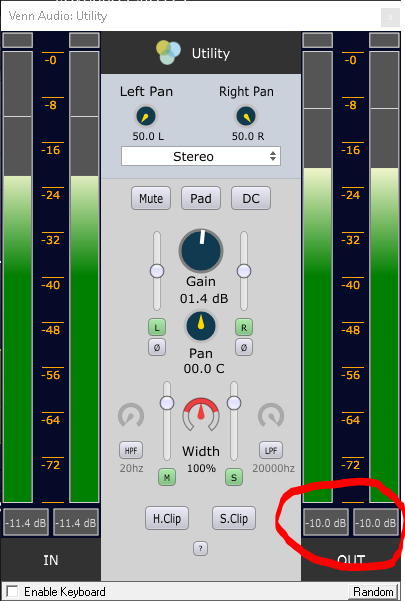
Venn Audio’s Utility plug is great to help set this up and for general metering of peak and RMS levels:
What also works very good is using pink noise to roughly get the levels right.
I did this on my latest track and the result was already better than what I did.
BTW: How loud is your kick in the final mix? I have it peaking at ~-6 dB typically and the bass too.
I just checked my latest tunes and the kick loudness was all over the place ROFL… 7db, 10db, 11 and 12db… I don’t think it matters much as you just lift the mix when mastering but if I were to always go for a set loudness I’d just choose 6dB as I certainly have way too much headroom… I will try go for that in the future at least for the sake of consistency
The -10dB is certainly not set in stone and something I have only just started working with. What works in each case will be different depending on style, particularly how much headroom you need for the bass and gainstaging specifics of master effects (some analog style effects can be funny with gainstaging/ headroom).
So -6dB may be a good/ better reference point too. My main goal is not to end up with compensating with a unnecessary gainers on the master ( = audible noisefloor hiss), then trying to ‘reverse engineer’ where my levels went wrong and inevitably messing up balances as I try to fix things.
I’m looking at a rule of thumb that if it takes more than one renoise gainer to get me to 0dB on the master, then somethings gone wrong!
I think -10dB for the kick is fine too leave some headroom. In the end you can add 4dB on the master and you end up with 6dB for the kick. When you work in the box with VST instruments only adding gainers should not matter imo.
I’m late to the game here, but this post is full of the best kinds of dark magic.
Eighteen months later, thanks for this!
No, no dark shit just love & energy and a peaceful nerd with blown mind and too much time for fooling around & internet access.
If you like that technique help spreading the love. I like to share, so I shared it, you can help to share.
What i do recently alot is changing the global pitch of my instruments during producing, when i get tired of the current song or to try out something else:
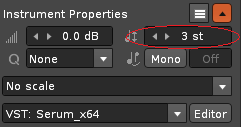
Some semitones up or down can sometimes give me new ideas or a different feeling of the melody. Its similar like flip the canvas horizontally to get a different view on the painting for new ideas or a different perspective, what digital artits often do.
I learned that the band split device in Renoise will alter the phase and parallel routing of the same signal will then lead into phasing issues. Never thought about it before. So it’s good to keep that in mind.
Here is some really simple but important advice when it comes to song structure and arrangement, that can make things a lot easier. Personally I’m a bit too guilty of neglecting to remove stuff from the arrangement as the song progresses. It’s easy to just wanna build up, and try to create contrast that way… maybe in hopes to remedy the situation later on in some breakdown ![]()
His very hands-on rule of adding/removing elements in pairs seem to work very well in practice.

I’m all about making very subtle changes nowadays. Eq, compression, reverb, delay… have all become very subtle things for me
The best production trick I learned in 2020 is that singing through a mask works just like a pop filter. 
