Automation over multiple patterns?

How do you guys work with making automation curves that span multiple patterns?

To me it seems like the only way to get around this is to use longer pattern lengths which i am not really a fan of.

I have seen the technique people use with the LFO where you create your own custom shape but i find it tedious having to tweak the amplitude of the LFO to get the value you want.

This is the easiest way:

You’ll still have to learn how to love working with automation curves in Renoise - not as easy as typical DAWs. And if you’re not a fan, well…

5 Likes

If it’s anything lengthy, I usually just midi map it and record it live. Gives a more organic and human feel, too.
The line tool is good over multiple patterns as well, but it is… well, linear

If it’s a simple curve, the snap at pattern boundary works well enough for me in most cases, but lfo devices do support high line/very low frequency values if you need more clinical precision.

5 Likes

If you don’t have a midi controller at hand you can also record automation live with your right mouse button on the target slider. Just right click, hold, move while the song is playing.

And yes, it totally sucks you can’t hand draw over multiple patterns. But you can draw linear lines over multiple patterns, sometimes that’s enough.

2 Likes

You can zoom in and out of the Automation envelope by placing the mouse pointer over the grid and scrolling the mouse wheel. The default zoom level is a single pattern, with the x-axis showing the full range of the pattern’s line-numbers. Zooming in you can begin to see fractions of lines all the way down to 1/256th, allowing for incredible resolution should you need it. Zooming out you can see individual patterns and eventually the entire song. Pattern numbers are shown in an envelope’s top left corner. The pattern you are currently editing is highlighted, which you can change by clicking on another.

When Lock is enabled, the zoom level is shown beneath the grid in the Automation Toolbar and can be changed there too.

3.2 automation-zoomlevels.gif

You can then edit across the multiple patterns then with a view to how automation relates across patterns. Hope it helps.

3 Likes

(before you even read this, keep in mind that this method is pretty boring and a bit dumb for today’s standards)

To be honest, I barely use graphic automation in Renoise. I tend to prefer the “in-pattern” FX commands, followed by “interpolate” (linear or logaritimic). I do it manually, even between patterns (which is kinda dumb and counter-productive, but still better than messing with the automation window using the mouse, imo).

One of my biggest complaints since I started using Renoise is the “snapping” between patterns in the automation window, because it’s very difficult to maintain a smooth automation without having to zoom in and adjust shapes. It’s not as straightfoward as other DAWs, which usually ignore pattern boundaries and treat automation like a continuous shape/line/curve, and not segmented lines, “glued” between patterns. However, this seems to be a limitation in the base code of Renoise, and it was addressed multiple times by the devs in other posts (sad face).

In the end, I just type my automation in the FX column, interpolate, and so on. Some people find this a lot more annoying than simply drawing lines, but, personally, I’d rather work with numerical values because I’m pretty fast w/ the keyboard.

Example: A simple automation that goes from 0 to 60 over four patterns. Divide 60/4 = 15.

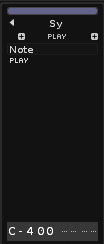
First pattern ->in the first line, I’ll place the value 0; in the last line, I’ll put 15.

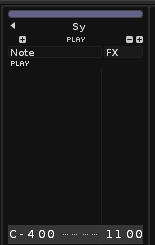
Hold shift+alt (or ctrl+alt? can’t remember now) to make a fine selection, press end (or home) to go to the start/bottom of the column. With the whole column selected (and only this column, not any other), hit ctrl+i for linear interpolation, or ctrl+L for log interpolation.

Second pattern → first line, 16… last line 30… interpolate. You can also try other values to make more complex shapes or to slow/speed up the automation values.

etc, etc.

Dumb ? Yes, but It’s MY dumb way of doing it. :sweat_smile:

Complicated? Not quite. All you have to do is quickly change patterns and interpolate. If you memorize the commands and are fast w/ the keyboard, it’s a very trivial thing to do, and even faster than the automation window, because the column selection is preserved when you switch patterns using CTRL+UP/DOWN, making it easy to interpolate the values using CTRL+I/L.

1 Like

I do this also. I don’t really like the graphical automation. I like being able to see where I have my automation written too

It’s left Shift + left Alt. :slightly_smiling_face:

I get the idea of your method, but this never worked for me. According to the manual those device commands should affect the track effect devices, but they don’t. Let’s say I would like to automate specific functions of a VSTi, therefore I put the Instrument Automation device in my track effect chain at the beginning. Let’s put the filter cutoff of that instrument in the first slot of the Instrument Automation and simply open that cutoff linearly from 0 at he beginning of the pattern to max at its end. So it’s 1100 in the track FX at position 0 and 11FF at position 256. Let’s hit Ctrl + I for a linear interpolation. Result: Nothing happens, the Instrument Automation device is not getting affected. It doesn’t matter which device I would like to automate this way, it’s always the same result and nothing happens. How exactly do you automate VSTi functions by pattern commands? And imagine you want to automate a lot of functions of the same VSTi. Isn’t it a pain in the ass to do it by using pattern commands? The more automation you’re doing this way, the wider the respective track gets and the worse is the overview. But I’ve seen you’re also using VSTs, so why does it work for you but not in my case? Did I miss something?

Anyway, I think it’s REALLY annoying that you first have to find out which function is allocated to which number, I mean there are hundrets of different functions in terms of a single VSTi. If you ask me it’s way faster and easier, a matter of seconds to be precise, to put the desired function (cutoff etc.) in a slot of the Instrument Automation device and simply make a few clicks with the left mouse button in the automation window. For automation over multiple patterns I mainly use the line tool and do the “finetuning” by hand if necessary. It’s fast, it’s simple and most importantly it works. But I would like to know on principle why the pattern command method doesn’t work in my case. Would you enlighten me? Thanks! :wink:

Are you sure “1100” is the correct command for the first slider of the Instrument Automation device? To make sure (I’m not in front of my PC now) right click the fader and see what number appears. Then navigate to where you want the automation to end, right click the fader at the desired value and interpolate between the two. I’ll test it tomorrow - I’m not sure what VSTs we have in common, may I suggest you get Surge XT so we can ensure we’re running the same VST?

The commands are 100% correct. Btw, the exact values also appear at the bottom. But I can answer my question myself. Indeed I missed something. Maybe it’s a bug, maybe it’s supposed to be like that. Maybe it’s already fixed if it’s a bug (currently I’m still using 3.4.1, Win10), maybe not. Let me try to explain step by step.

  1. My default settings (pattern editor)
    0
    As a result a single track looks like this:
    1

  2. FX activation:
    2
    A FX column should appear:
    3
    The column that appears is not a FX column, and that’s exactly what I missed all the time.

  3. Click the + sign on the right to create another fx colum:
    4
    Now FX is assigned to that second FX column and all comnands are working within that column.

I assume this is a bug. A single track after FX activation should look like this (FX assigned), but without the - symbol on the right:
5
Instead it’s like that after creating amother FX column by clicking the + sign on the right and when FX is deactivated.

All right, problem solved. Nevertheless I prefer the graphic automation, line tool and finetuning afterwards if necessary.

1 Like

About Automation in the Tracks. A track has two separate parts (two groups of 12 and 8):

  1. The Note, Instrument, VOL-PAN-DLY-FX subcolumns (from 1 to 12).
  2. The Track Effects sub-columns (buttons - +) (from 0 to 8).

VOL-PAN-DLY-FX serve as effect parameters for samples (they influence the behavior of the sampler). The lower “FX” switch intended for “sample effects” should not be confused with a sub-column of “track effects”(buttons - +).

  • The “sample effects” sub-column (up to 12) accepts sample effect parameters, only.

  • The “track effects” sub-column (up to 8) accepts sample effect parameters and track effect parameters, both. The parameters for plugins are also included here.

Both work separately. In fact, you can hide any sub-column and it will stop working, not affecting the rest.

The Renoise User’s Manual describes all of this. It is recommended to read it for certain peculiarities, distinguish all sample and track effect parameters and where they should be placed…

Mouse. Right-click automation parameters are automatically recorded to the first sub-column of “track effects”. If you want to record in another sub-column of track effects of the 8 available, you must previously select it.

MIDI In. Renoise does not analyze if an effects subcolumn is busy with another parameter in order to switch effects subcolumn automatically. Using the mouse there is no problem. Worse, I think this prevents automating several parameters at the same time through several controls through the MIDI input and Edit Mode enabled. Perhaps this should be cumulative across multiple sub-columns and not overlap. But it’s good to know these things.

Many things in Renoise are focused to be edited by separate steps.


Regarding Automation in the Automation Editor, simply use the line tool to draw lines between various patterns. This will generate 2 start and end points in each pattern. Then switch to pencil to concentrate dots in the same pattern.

Patterns are like separate units or entities, and you need to think about it that way to edit them. However, thanks to the line tool and the horizontal zoom, it is possible to edit them at the same time, fortunately.

There is a thread on the forums dedicated to describing wishes and features that composers want to improve Renoise.

Well, the automation editor (more tools) and the recording of the effect parameters through the MIDI input (in several sub-columns at the same time) are things that could be improved.

For example, it is possible to select multiple patterns in the automation editor. But you can’t delete the points in one operation from all those patterns at once, nor use the correction tools on the right (raise, lower, randomize). The selection is simply a beta.

2 Likes

Jup, that’s what I missed. And I RTFM years ago. Things happen if you never need to use it. And I think the separation makes no sense, but that’s another story. Maybe it’s a programmer’s thing.and I just don’t get the point.

With the separation, greater precision is achieved when assigning parameters, whether they affect a single thing or that affect multiple things at the same time.

Certainly, at the programming level it is much more complicated than at the use level. Renoise as a tracker is very well thought out. The fact of entering some numbers and letters (very simple) and having something specific in the audio change (very complex) is really great.