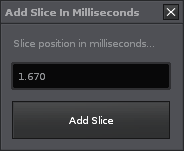
Hi,
often, reading sound design tutorials written for other DAWs, they say to change the sample starting point some milliseconds ahead. I know in Renoise we can’t put the starting point directly, but I can easily slice the sample to have other versions of it with different starting points. What’s bothering me the most is that often they say to set this offset to 1.67ms, for example, and I’m not sure whether we have this resolution. If in the sample editor I choose to display “minutes” I have three digits for the milliseconds but between 00.00.001 (which I suppose is 1ms) and 00.00.002 there’s nothing. Maybe it would be useful having a bigger resolution.
I think I’d like to see some examples of these tutorials you’re talking about? 1.67ms sounds ridiculously specific for a tutorial that I’m assuming needs to apply to a lot of different sound types. I’d like to understand how they calculated that exact value to be the most beneficial, and what it’s actually supposed to do.
Anyway, in the meantime you can use the Samples ruler instead of Minutes.
Formula:
(Sampling rate / 1000) * 1.67 = number of samples you need to offset
I was reading this Ableton Live tutorial: sonictransfer.com
Anyway, I agree with you: that offset is ridiculous, but I don’t know, it just seemend like a magic number so I felt to ask.
As I expected, this is a very specific tutorial, and those values are probably only ‘perfect’ for a very limited range of sounds (ie. the samples included in that particular tutorial). I wouldn’t worry too much about following these exact values in your own experiments; just play it by ear and see what works for you.
If you’re experimenting with layered sound design in this way, and these delay/offset times are quite important to achieve the desired result, then I would recommend putting your individual samples on separate tracks in Renoise, then use the Delay setting found in each track (where you also find Routing, Panning, Volume, Width, etc). It’s very easy to set a precise delay value like 1.67ms in there.
Are you sure this is working this way? I mean: if I put a delay on the first track with a kick, it just triggers the kick after a while, but the sample is always played from its start. Am I wrong?
Put a kick drum on Track 01 with 0ms delay.
Put a snare drum on Track 02 with 10ms delay.
Put a clap on Track 03 with 20ms delay.
(All notes triggered on the same pattern line)
You will hear: Kick > 10ms delay > Snare > 10ms delay > Clap
If this is not what you meant in your original post (and the tutorial you mentioned), then I must have misunderstood something.
Edit: Forgot to mention that, yes, all samples will play from their start position. I thought you simply wanted to offset the timing of the samples being triggered?
Ah, ok. Then I simply misunderstood you. Sorry about that.
If you don’t want to destructively edit the sample itself, then you’re probably right: slices are probably best to handle this type of stuff. It’s just unfortunate that the ‘minutes’ ruler is not quite accurate enough for you in this instance.
 tnx anyways on the tool
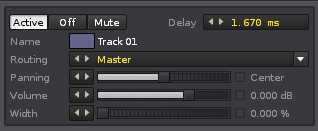