Me and my friends are tested , so its work flawless for now.
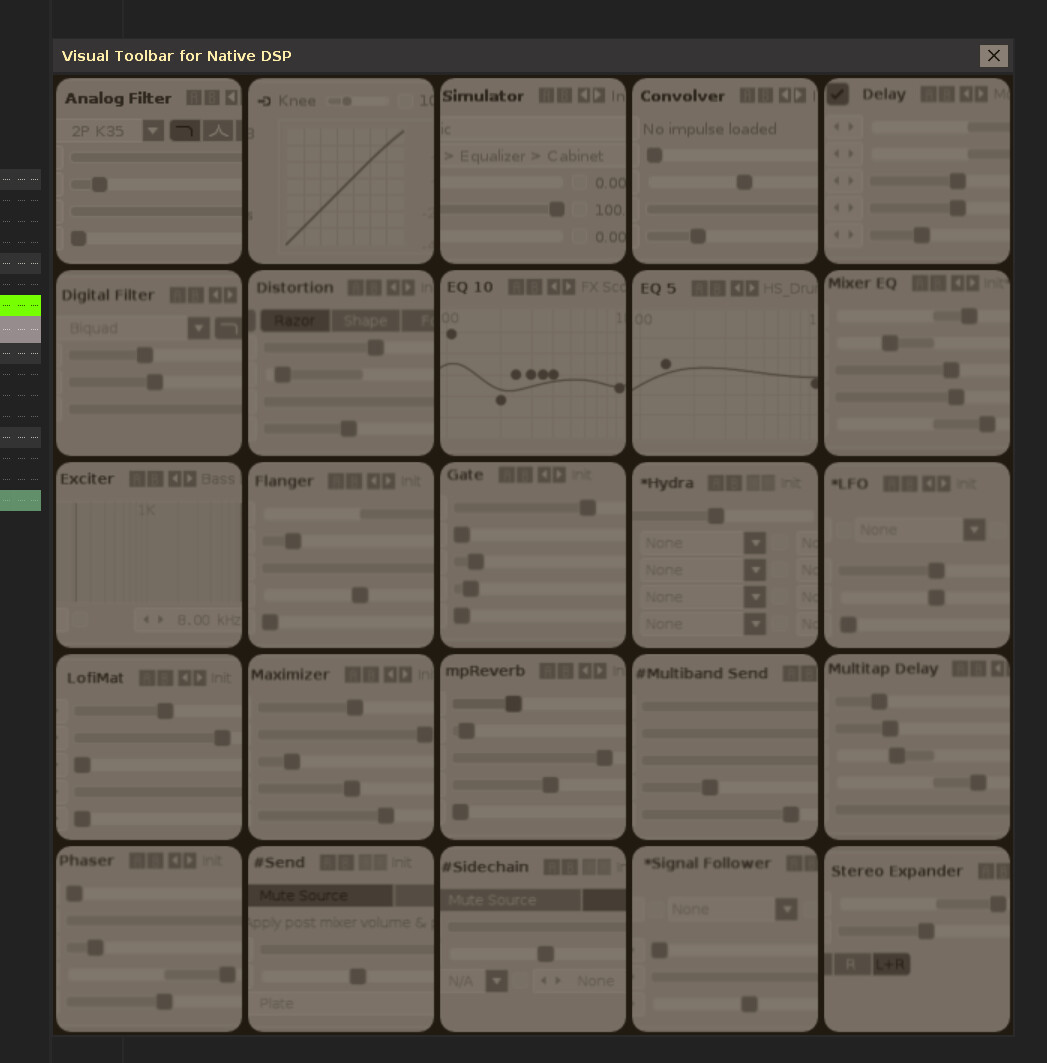
It is a visual toolbar like in Reaper. But im not a programmer scripter, so i have some problems with my features to deal with. Maybe someone can help me a little if you have some time.
First i realise there is no way to use colored button images. Right ? its always based on the Theme colors.
I want the rollover state to be colored images. Thats looks awesome. Or maybe colored version all the time.
Is there any trick that can help me about that ? Maybe a bitmap and a button in overlay with alpha…
Another thin is is i can’t resize the Button images to fit smaller or bigger sizes. it would be awesome i can do that for smaller screen users.
here is the Tool itself so you can check them out., happy using…
I also made a VST effect version, and Instrument versions. So its three Visual Browser, but the VST version is need to setup by users… but maybe i can create a workaround for that… but its too hard coz every artist has its own VST as u know…
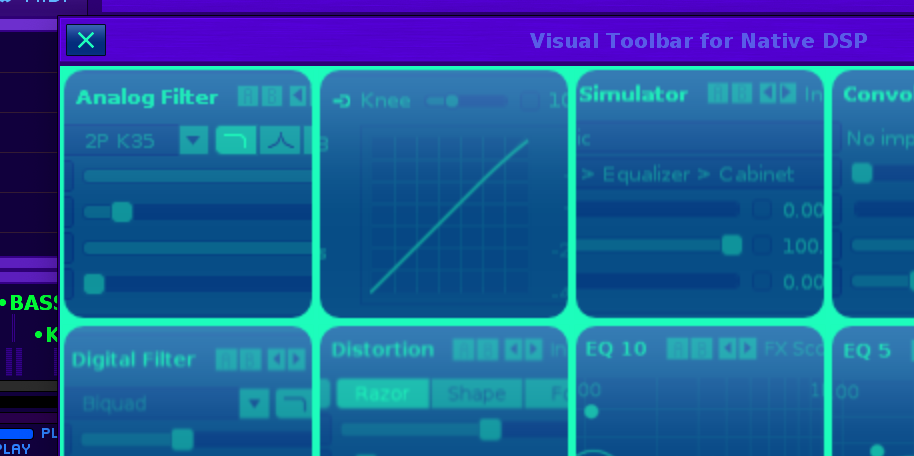
also, the bitmaps are all a little blurry. any way to sharpen them up with higher resolution images?
thanks for this!
Also, a general question for tool window keybindings… Does anyone know if it is possible to make the keybind act as a toggle that not only invokes the tool window, but also closes it? Or is it possible to keybind tool window closure in the first place? It’s a minor annoyance to switch from kb to mouse when working with tools generally
yes, I’ve already done this
my question is about closing tool windows via keybind. anyone have any idea?
Seems like some tools can close windows and others can’t
1.- Use png images with transparency to allow the color of the button to pass through.
2.- In the iteration function that you will have used, create:
Enveloping with a row with negative “spacing” of the button width (spacing=-128).
Inside that row the “button” and the “bitmap” objects separately of the same size 128x128 (width=128, height=128). This is all for “button drive” within the iteration.
Place all the titles of each button image in exactly the same location.
Use Renoise’s 100% scaling to create images that correspond to the same size. This guarantees sharpness with each scaling. It’s worth it!
Use the “@” characteristic in the name of the each png images for scaling: name_image.png (original size 128x128) name_image@1.25x.png (original size x1.25) name_image@4x.png (original size x4)
Besides…
I suggest you capture the images with Renoise scaling at 350%. You increase each image by 50% until you reach 400% and take this image of 350% as a base to create the rest of the png image sizes more smalls.
Save images in 8bit with transparency to take up little space.
view this:
If you use image scaling and a great dedication to creating beautiful images, true to the look of Renoise, it will look great! I think a “negative” image look would be appropriate, without color and with transparency of the background. I think the bulk of the work is creating the right images and your scales.