Cool, I’ve never really noticed that within almost 13 years. ![]()
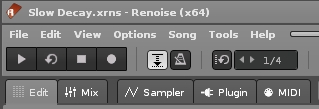
As long as one doesn’t run Renoise in fuill screen mode, the song name is always on the upper left:

Cool, I’ve never really noticed that within almost 13 years. ![]()
As long as one doesn’t run Renoise in fuill screen mode, the song name is always on the upper left:

Huh, that’s also good to know! Always running in full screen, so I’ve literally never noticed that
@slujr can i ask you a quick question? How would you simulate modulating filter cutoff with white noise in a sampler instrument? Is the random LFO fast enough? Curious for your input on this, thanks.
random lfo only goes up to 20 Hz, which is probably not fast enough. Our limit for modulation changes is tick rate, so check your song options in the song menu and set it to 16 if you wanted the fasted possible audio modulation.
I would tie filter cutoff input (or an operand) to a macro and use the macro control doofer to do the modulation in the fx section. It should get you a little more speed than 20 Hz, depending on project tick rate, lpb, and bpm
Hope this is helpful. Not sure if you’ll be able to emulate the result you’re after, but, worth a shot!
UTIL - MACRO CONTROL 1.xrdp (28.9 KB)
I will have a look at that later. I already knew that broad band noise modulation wasnt possible really - but you have so many very creative hacks, i knew that if anybody had a solution, you were the guy to ask.
Thanks ![]() yeah the tick rate/lpb/bpm really is a hard limit for audio signal changes. If we had audio rate modulation, that would be a huge game changer for native synthesis capabilities in renoise, but it would necessitate some major changes that are not likely to happen, afaik
yeah the tick rate/lpb/bpm really is a hard limit for audio signal changes. If we had audio rate modulation, that would be a huge game changer for native synthesis capabilities in renoise, but it would necessitate some major changes that are not likely to happen, afaik
Look on the bottom right, bro. 123 is there
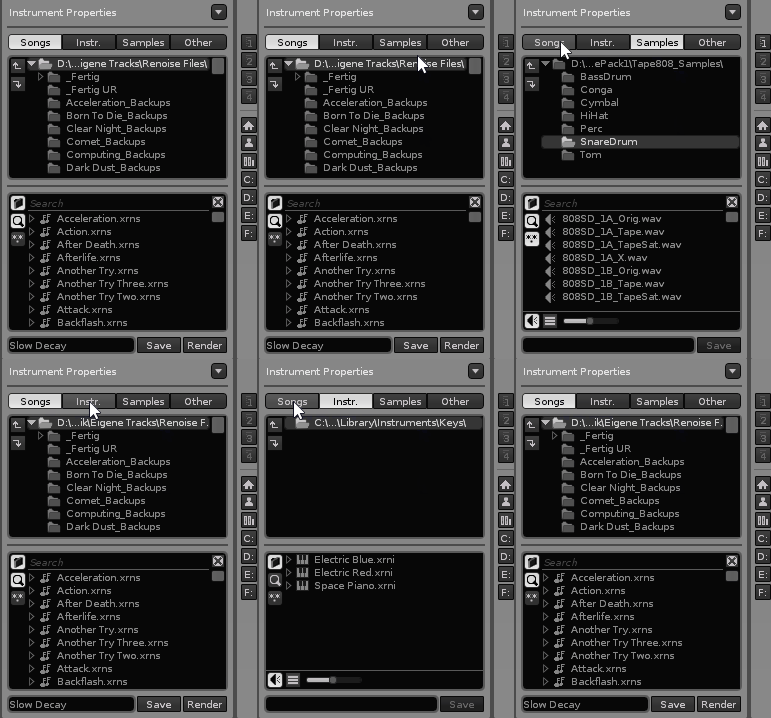
As long as you have the songs tab selected, the current project name is displayed there
When I hit instrument or sample tab and hit back in song tab, that field is empty. Maybe i must select another version of Renoise? This one is ver. 3.2.1.
At all parties!
![]()
Maybe.

Or don’t run in full screen mode and watch the upper left.
+1000 I turn all my fav Kontakt banks and Arcade note kits into Renoise instruments. And I definetely thought to myself, the sampler already has note-off layers, the path to extremely realistic or at least on the level of Kontakt instruments is right there.
Honestly a LOT of Kontakt instruments lack velocity layers, round robins, note offs, etc… just a single sample for each note. And the Arcade note kits are actually just 5 samples (no velocity layers) spread across an octave range like the old school hardware samplers(Korg Triton). My Xnri’s are 10x larger than plugins version because I max my rendering settings out(every note and every velocity layer)
Maybe the option of lua scripting the instruments/samples(idk if this is even possible) Kontakt killer right there.
I also wished there were more options when dragging multiple samples to the keyzones editor to make life more easy when creating multi-sampled instruments. Currently the samples always get aligned horizontally so they end up on different keyzones, which is fine in many cases. But sometimes you want different alignment without dragging samples to the keyzones individually.
Thus it would be really convenient if I could specify different drag&drop modes via a modifier key or toggle button, e.g. “Velocity Layers” (selected samples will be distributed vertically and evenly split by number of samples) , “Round-Robin” (selected samples will be placed on top of each other in one keyzone) and maybe “Octave” (the second selected sample will be placed exactly one octave above the first one etc.)
My biggest Renoise wish is that the window browser more intelligently selected the folder to open instead of opening the last one. For example, when I click “Save Instrument”, it should default to my “Instruments” folder, rather than the last folder Renoise opened (which tends to be the songs I saved last).
Big +1 on a column showing a vertical wave of the adjacent sample. Would be great to have this as a “sub-lane” of the track, for reference as much as anything.
It would be cool if you could route modulations like you do for fx (effectively becoming a modular environment like Eurorack, with an alternative gui).
I have three samples: Triangle, Saw and Square.
I assigned a different modulation for each sample, now it would be cool to route all three modulations inside a fourth “group” modulation, but I don’t think I can do that.
Definitely not in the way I expect.
If there are already ways to do it, I’ll try to learn them.
The instrument fx section is essentially our modular environment. You can more or less replicate the entire modulation section within instrument FX, and do much more complex signal routing there. Oftentimes, I will offload all modulation to instrument fx. The downside being monophonic signal processing. For polyphonic modulation, modulation sets are the way to go. And you’re right, there’s no real way to chain or nest modulation sets within one another. But again the instrument FX section can be super useful for group processing, in addition to many other creative uses
Could Macro controls be an alternative? I take a knob and play around with the settings by having it change all three envelopes ![]()
Sure. If it works, it works
+1 for MIDI out from Redux. But. Come On! There is no better sampler than the Renoise sampler …
+1 No, seriously, there isn’t ![]()
And I’m ready to argue too. I’m down for some good ole fussing and fighting lol
I’m might go invade the IL forums ![]()